Showing posts with label Tips. Show all posts

Monday, April 30, 2018

Minecraft Pe Nova Skin Skin Finder


In Minecraft pe have you ever gotten tired of just having normal skins? Well I know how to get more with the website minecraft.novaskin. So just go to google or safari, and type this in minecraft.novaskin, then either go to gallery (where you can search skins), or go to Nova Skin - Minecraft Skin Editor (which is of course a skin editor). I have just recently made my own skin, and published it. It is called "my scuba steve" as you can see on the picture. Inside the skin editor you can search skins to edit, you can take colors from the skin you are editing, and the possibilities are endless with skins!


 I would highly recommend this website for skins!

Anyway I am so, so sorry about how short it was today, but that's it for today! Goodbye!

Tuesday, April 17, 2018

Minecraft Pe how to Make a 3x3 Piston Door

Hey guys I have just recently changed my name from Ike06 to SmallSteveT, so if you sometime see me, then please leave that in the comments!  Anyway now I am going to tell you how to make a 3x3 piston door!  This contraption is useful because you can hide a secret base, if you hide the lever or button.  Very cool! First of all, you see those white blocks and stairs? In those spots you can put whatever you want there! Oh, and on top of that you can get any block or half block that you want, except for the Redstone mechanics! 

Here are the steps for making this bad boy! First make a way to power this big creation that you are about to make. Then place three blocks from right to left. Next place a Redstone Torch on the very right block that you've placed so far. Then, place Redstone Dust connecting to the torch, and of course make sure that the Redstone is going to the left. The next thing you will do is, place one block to the left of the Redstone Dust, except higher than it. Then place a Redstone Torch on top of that block that you just placed. Next place a sticky piston with a block on it to the right of the torch you placed, and then place a block of your choice to the left of the torch, (oh, and make sure it is facing the right). The next thing you will do is, place a Redstone Torch on the block to the left of the other torch. Then get a block with a Redstone Repeater with a four tick delay on top of it, and place it to the right of the torch you just placed on the last step. Next place an observer that is facing down with a Repeater that has a one tick delay on top of it, and place it to the right of the last block that had a Repeater on it. The next thing you will do is, place a sticky piston (that is facing the right) to the right of the Repeater with an observer below it, and then place a block on the sticky piston. Then place one block with Redstone Dust on top of it that is higher, and is to the left of the first Repeater. Next place a block right above the first Repeater that has Redstone dust on top of it as well. The next thing you will do is, place three sticky pistons (that are facing the right) on top of each other that each have a block connecting to the front of them (and make sure that the bottom sticky piston is to the right of the block with Redstone Dust on the last step). Then place two half blocks, and the first one is to the right of the block with Redstone Dust on it, except one block higher than the block with Redstone Dust on top of it (NOT the Redstone Dust itself). The half block is one block higher than the other half block, and is to the right of the other half block. Then place Redstone Dust on top of the first two half blocks, and then place two blocks one on top of the fourth sticky piston and one two the left of the block you just placed. Next place Redstone Dust on top of the first block on the step before this one ( in other words, the last step), and then place an observer on top of the second block on the last step. 

The next thing you will do is place two more half blocks, the first one is to the left of the block with Redstone Dust on the last step, and is one block higher than the block that I just mentioned. The second half block is to the right, and is one block higher than the other half block. Then place Redstone Dust on top of the two half blocks, and you can only do this if the half blocks are placed correctly. Then place two blocks with Repeaters on them. The first block with a Repeater is on top of the observer, and the Repeater has a four tick delay. The second block with a Repeater is to the side of the block with a Repeater that you just placed, and the repeater you will just leave alone (or you can say a one tick delay). Next place a block to the right of the second Repeater, and then place a Redstone Dust to the right of the second Repeater. The next thing you will do is, place two sticky pistons (both facing down), below the block connecting to the two second Repeaters, and one of the pistons you just placed is on top of the other. Then place one block on the bottom sticky piston from the last step, and then place a Repeater facing, and connecting, to the bottom sticky piston that I just mentioned. Next place Redstone Dust to the right of the second observer (this Redstone Dust will be facing the bottom sticky piston of the two sticky pistons facing down). The next thing you will do is, place a block with Redstone Dust on top of it to the right of the top sticky piston of the two sticky pistons facing down. Then place another block with Redstone Dust on top of it to the right of the last block with Redstone Dust on it, and below that block I just mentioned with Redstone Dust on it. Next place two blocks, one block is right below the block on the last step, and the other has Redstone Dust on it, and is to the right of the block you just placed. The next thing you will do is, place a sticky piston (that is facing down and has a block of Redstone on it) to the right and higher than the block with Redstone Dust that you just placed. Then place three sticky pistons (that are facing the left) below the block with Redstone Dust that was two steps ago, and make sure that they are on top and below each other. Next place four blocks, one has Redstone Dust on it, and you will place to the right of the bottom sticky pistons of the three sticky pistons (that are facing the right), and the other blocks you will place on the front (or you can say the face) of the three sticky pistons that I just mentioned. The next thing you will do is, place an observer (facing down) that is below the block connected to the bottom sticky piston (that is facing the right). Then place three blocks, one has Redstone dust on it and you place one block away from the third observer, and one of the other blocks is to the right of the block with Redstone Dust on it, and the last block is on top of the block to the right of the block with Redstone Dust on it that I just mentioned. Next place two sticky pistons (facing up), and the first sticky piston is to the right, and right above the first Redstone Torch in this creation, and the second sticky piston is right above the last one that you just placed. Now you should be done, but I would recommend filling all of the one-block wide, and one-block tall holes that you can fill just in case. 

Anyway, that's it for today! I'll tell you about something different on the next blog post! Goodbye!

Monday, April 16, 2018

Minecraft Pe how to Make a Better Secret Chest Using Commands and More


In Minecraft pe there are a few ways to make secret chests, but the best way is with commands!  Here are the steps for making a secret chest using commands: First get a command block and a lever, or button. Next place the command block above where the chest will be, and type this in it:

/summon chest_minecart ~ ~-1 ~0.5

the 0.5 will either be on the first "~" or the second one, but it can also be -0.5 on either of them depending on where you placed the command block. But depending on where the command block is, it could be 0.1 or 0.2 or possibly 0.3, or negative values for any of those numbers. If you do this correctly you should be able to access it and not be able to see it. But you have to have a block (any block) above the secret chest, or else you will be able to see the top of it!  Now I shall tell you how to make a locked chest with a sword lock pick!


Here are the directions for making the locked chest with a lock pick: First get these items: four command blocks, one iron sword, one chest, one shulker spawn egg, Redstone Comparator, one Redtone torch, a 6x2x3 hole in the ground, and how ever much you want of the block of your choice. The next thing you will do is place two command blocks at the thin back part of the hole, and make sure the arrows are both facing the right. Then make the command block on the left repeat, and always active. Then type this in the always active command block:

/enchant SmallSteveT looting 1

Then place the comparator so that the two red parts that are closer to each other are facing the always active command block. Then get out a iron sword, and place it in your hand. This will enchant your sword, and when it does it will power up the comparator!  The next thing you will do is place a block right in front of the comparator, then place a Redstone torch on that block. Next make the command block to the right of the always active command block a chain, conditional, and always active command block. Then type this in the chain command block:

/tp @e[type=shulker] 357 55 22

But type in the coordinates of the location right in front of the first chain command block, instead of the 357 55 22. Then place a command block to the right of the Redstone torch, and the arrow must face forward from where you were standing. Next make that command block a second repeating command block and do NOT make it always active. Then type this in the second repeating command block:

/tp @e[type=shulker] 357 58 22

The coordinates will be the same as the first, but the number in the middle (highlighted above) will be 3 above the other coordinates in the other command block. Then place another chain, conditional, and always active command block, then type this in that command block:

/effect @e[type=shulker] invisibility 99999 250 true

All of this will teleport the shulker in the spot of where you have to place the chest, and the shulker will be invisible so when you hold the lock pick it will teleport the shulker back to the original location. So now you have a locked chest and lock pick!  That is so cool, right?!

Anyway that's it for today!  Goodbye!

Monday, April 9, 2018

Minecraft Pe How to Make Magnetic Arrows and More!

In Minecraft, have you ever wanted to keep mobs in one place for just a few minutes?  Well, now you can with the Magnetic Arrows Cheat!


  All you need is just a command block, and that's it.  First type this in the chat:

/tickingarea add ~-2 ~-2 ~-2 ~2 ~2 ~2 CMD

Then get a command block and make it always active and repeat.  Next, type this in the command block:

/execute @e[type=arrow] ~ ~ ~ tp @e[r=5,type=!player,type=!arrow] ~ ~1 ~

This will make it so everything except for other arrows and players, within a radius of 5 blocks, will teleport to the arrow you just shot!  This is helpful because on survival, enemies will chase you, and you can just keep them in one place and build a fence around them. 

Now for another command.  The Super Arrows Cheat!


  First get a command block, and change it to repeat and always active.  Then, type this in the command block:

/execute @e[type=arrow] ~ ~ ~ kill @e[type=!player,r=5]

This will kill everything except for players within a radius of 5 blocks of the arrow.  This is helpful for getting mobs out of the way, and getting tons of items that the mobs drop (commonly called "drops").  That's pretty cool, huh?!

Anyway, that's it for today!  Goodbye!

Friday, April 6, 2018

Minecraft Pe /give Command Components and More

In Minecraft Pe the "/give" command has only two components =( . Those components are called "can_place_on" , and "can_destroy".


 But this will make the command more longer. Also these parts of a command they are used for adventure mode only, they don't do any thing on survival or creative. Here is a example of the "can_destroy" part of the command:  you are on adventure mode because your friend wanted to be kind of mean and wanted to test you.


 So you type in this:

/give @s diamond_pickaxe 1 0 {"can_destroy":{"blocks":["stone","cobblestone","iron_ore","diamond_ore"]}}

This will give you, well, a diamond pickax (in minecraft a pickax is called a pickaxe) that can destroy stone, cobblestone, iron ore, and diamond ore. Also you will probably want to type this in if you can't find a cave:

/give @s diamond_shovel 1 0 {"can_destroy":{"blocks":["grass","dirt"]}}

This will make it so you can dig through the grass, and dirt in order to get to stone if you can't find a cave nearby.  Here is a example of the "can_place_on"(which is the other component of the command) part of the command:  you are still on adventure mode because of your friend, and you need shelter for the night. So you type this in:

/give @s planks 64 0 {"can_place_on":{"blocks":["grass","planks"]}}

This will make it so you get oak planks that you can place on grass, and oak planks so now you can get shelter. Then your friend takes you off of adventure mode and on to creative mode again, and you have finished your test.

Now I will tell you how to make a good doorbell with commands.


First make your house, then break two blocks up so a player could fit in that space. Next place a command block on the bottom block, and type this in:

/playsound random.levelup @a ~2 ~ ~ 1 0.5

Then place a block above the command block and place a button on that block you just placed.
This will play a sound of a player leveling up their experience point bar, but more slower than normal. The "1" in the command means how loud the sound is, and you can make this as loud as you want! The "0.5" in the command means how slow or fast it is. The normal setting for this is 1. This command will sound extremely like a doorbell or maybe wind chimes.

Anyway that's it for today! Goodbye!

Thursday, April 5, 2018

Hello Neighbor Xbox One Act 1 Guide

In Hello Neighbor Act 1,  here are the steps to getting to the basement: First get 2 big boxes and one small box from your little room underneath the stairs. You can pick up stuff or use stuff by pressing "RB" , and unlock locks with a key by pressing "LB". Then go to the neighbor's house and go up to the top of the shelf that is outside and jump by pressing "A". At the same time that you are jumping, place down a box by pressing"RT" NOT "RB". Then place one more big box underneath you by jumping, and go onto the roof that is lower than the other roof that is close to you. Then run by holding "LT" and jump onto the higher roof. Then go to the other roof  that is a tiny bit to the left and in front of you.  Break one of the windows with the small box by holding "RT". Then go inside and take the biggest painting off the wall.  You will notice that there is a broken wall. Go inside that room with the broken wall and grab both the golden key and the red car key.


Which are both hanging up in two different places. Then unlock the golden lock right beside where the golden key was. Then go to the car on the outside of the neighbor's house and unlock the trunk. Then open the trunk and grab the magnet which is called the magnet gun. Then go back up the shelf onto the lower roof, and then onto the higher roof, and then onto the second lower roof with the windows. Then go inside the room where the keys were again. Then go to the door that is still locked in that room and peek through the key hole by holding "RB" and then use the magnet gun by holding "LB". Then stop looking through the key hole and still hold "LB". Next look on the red carpet that you are (or were) standing on and you will eventually see the red key to the basement!


 Go back outside and throw a random item that you don't need at any of the back windows, and make the neighbor see you somehow and run to the street! Once he stops chasing you, the broken window should distract him. Then make a dash for it and unlock the basement door!

Go inside the basement. You see the basement looks like a normal room
 But no! Open up the washer machine and go through.


 Then open the door in front of you and you will be inside a little room. Break the first window to the right with something, or with yourself. Then you will see a power switch that you will eventually use


 Next to the power switch there is a door and prison-looking bars. Then open up the prison bars with a switch that is right next to it (not the power switch) and go to the very end of the hallway inside of that room, but there will be a few turns. Beware: the neighbor will come in the basement and set up security cameras and maybe bear traps. Then you will see a creepy mannequin --  just throw it out of the way of even more prison bars. Then open the prison bars and you will see the door with the exit sign but it is barred up. So then you go in the door  that you will see as well by taking the chair off of it. Then you will see blackish bricks.


 They are fake! Then break them by running into them! Then you will see and hear an electric thing which you don't use. Then make your way back to the beginning by going through unblocked doors and taking chairs off of them. Then turn off the power switch and run back the way you came and be careful of the neighbor! Then go back through where the blackish bricks were, and there will be an opening to a machine with a red light bulb. Then push the button on it and go back to the beginning again and turn the power back on. Then go back through both of the prison bars and you will be able to flip the switch to the door with the exit sign.


Then flip the switch and go through!  You will see a hallway with a few turns. Then the neighbor will come through the door!


 RUN!


 Then at the end of the hallway there are three locks  on a door that you don't have keys for!


 Then the neighbor will catch you and you will now be in act 2. But one time I put boxes at the end of the hallway where the neighbor chases you and it was SO funny because it block him! It looked like the neighbor was dancing! 🤣

But That's it for Hello Neighbor Xbox One Act 1 Guide! Goodbye!

Tuesday, April 3, 2018

Minecraft Pe Title Command and More


In Minecraft there is a title command.  If you have noticed it and have never used it, don't you wonder what it does?!  Well, I am now going to tell you!  Here are some examples:

/title @a clear

This command will clear any titles on the screen for everybody.

/title @a reset

This will put the title command to default settings, if you've changed the settings.

You can also make a title and a subtitle.  The title is in large words in the middle of the screen, and the subtitle is in smaller words beneath it.  You have to have a title in order to have a subtitle.


So if you wanted to make a title and subtitle that says, "GOODBYE my friends", first type in the title like this:

/title @a title Goodbye

This will display the message "Goodye" in the middle of the screen as a title.  Then write in your subtitle like this:

/title @a subtitle my friends

These two commands combined would look something like this (with a different font, of course):


You don't have to use "Goodbye my friends" as the message.  You can put anything you want!

/title @a times 60 140 80

This will change the settings of the titles that you use next.  It will make the title fade in, and then stay, and then fade out.  The numbers are ticks.  There are 20 ticks in a second.  So the command above makes it fade in for 3 seconds, it stays for 7 seconds, and then fades out for 4 seconds.

If you want to prank your friends, here are the steps:

First, get two command blocks and place them so the arrows on them are facing right from where you are going to be standing.  Place a button on the command block to the left, and type this in the command block that you just placed the button on:

/title @a title §4run!

This will get rid of the §4 and say "run!" in red letters.  The numbers determine what color the letters are.  If it's a different number like 3, it will be cyan. In order to make the § sign on the computer, press "alt 0167".  In order to do it on the Kindle Fire, hold the copyright sign down, and put your finger all the way to the left once the other options appear.

Then, make the command block to the right a chain command block.  Then type this in that chain command block:

/title @a subtitle §4it's herobrine

This will make a smaller title in red, below the red title saying "run!".  So now it will say "run! it's herobrine", and it will look something like this:

run

it's herobrine


Here is another way to prank your friends!  First, get a command block, and type this in the hover note in the command block:

Herobrine

Then, type this in the command block:

/say I bet you've heard of me for I am Herobrine and you shall all perish very very soon

This will look like it's Herobrine saying to you that you'll die very soon, which is a great way to prank your friends!

Anyway, that's it for today!  Goodbye!

Thursday, March 22, 2018

Terraria: My Theory About How to Kill the Dungeon Guardian Much Faster

In Terraria, have you ever tried to defeat the Dungeon Guardian faster?  Well, I have a theory of how to defeat him faster.


 First, get a shark tooth necklace, and equip it. 


Then, get a sharpening station and use it.


  Then, get a ton of ichor bullets and an insanely fast-shooting gun, like the Mega Shark.


 Then, shoot the Dungeon Guardian for a bit, then use your melee weapon (like the Terra Blade) for some more damage. 


I would recommend having a friend be inside an Invincibility Machine (like I mentioned in my other post) while YOU attack.


 If you do this, you will be able to defeat the Dungeon Guardian much faster.

Anyway, I just wanted to share my theory with you guys.  And that's it for today.

Tuesday, March 20, 2018

Terraria Xbox One Glitches

In Terraria there are a ton, and I mean a TON, of known glitches.  For example, the Fishing Glitch, which I will now explain.  What you do: you have to get a ton of something you don't need (for example, dirt blocks).  Then, cast out the fishing line, and turn Auto Pause 'on' once.  Then, go in your inventory, which will pause the game because of Auto Pause, and throw out one of the dirt blocks (or whatever you don't need).  This will make you get two more fishing lines!  You can keep on doing this until you want to stop!  For that glitch, if you don't like what you got from fishing, you can sell it, and you can get a lot of money.


Now I will tell you about the Infinite Chest/Money Glitch.  First get out some active stone blocks, and place two of them.  Then, place a chest on top of the two active stone blocks. Then, you place another block (any block) next to the active stone blocks.  Then connect wiring to the active stone blocks, and turn the two blocks off.  Then, try placing another chest too close to the previously placed chest. Keep on doing this to get a ton of chests, which you can sell!


Now I will tell you about the Infinite Healing Glitch.  Beware: this glitch also requires Auto Pause to be on.  First, get anything you want to throw out, for example dirt blocks.  Then get the best healing potion available, and hold the potion.  Next, go into your inventory, and throw the dirt (or whatever you want to get rid of) out, and you will heal!  You can keep on doing this until you have full health, or you can keep on doing it forever, but it'll waste your potions.


Anyway, that's it for Terraria Xbox One Glitches!  Goodbye!

Monday, March 19, 2018

Terraria: My Martian Madness Strategy

In Terraria, there is an event called Martian Madness.


If you want to find and defeat Martian Madness, here is the best way to find and defeat it.  First, you have to beat Golem.  Then, go to either side of the ocean and build up until you are either in space, or almost in space, and build a little sky house.  Then, find a Martian Probe, which looks like this:


Then go inside the weird, green space beam, and it will turn red.  Don't kill the Martian Probe!  If you do, the Martian Madness event will not come!  If you don't kill it, then the probe will go up to warn the Martians about you!  Then it will say "Martians Are Invading" on the bottom left corner of the screen.Oh, and make a hole that is like this in the ground:


Or, if you don't want to make a hole like this, find a little cave and make a little room by blocking off all of the entrances.  Making a hole or room like this makes it so most of the enemies can't attack you.  Then, use your Solar Eruption if you have one (or any weapon that can go through walls), then you should be done!  You can defeat the Martian Madness from the safety of your room!

This adventure is over, but we have so many more adventures to explore!


Anyway, that's it for today.  Goodbye!!

Tuesday, March 13, 2018

Minecraft PE Invincibility Machine Cheat and More

In Minecraft there are tons of cheats, or some people call them "hacks" or "hax."  One is the infinite diamonds/iron/emeralds/coal/Lapis Lizuli (which I will explain later in this post).

Now let's talk about the "replaceitem" invincibility machine.  This cheat makes it so when you die, you will always respawn in the same spot where you died, and have all of your stuff!


 First make a command block redstone block clock which looks like this:


In order to make the clock you get a command block (I've told you how to do this in some of my other posts), then place it. Then change it to a repeat command block.  Then, set up another command block with one block in-between them, and place the command block North of the repeating command block.  Then type this in the new command block:

/setblock ~ ~ ~-1 redstone_block 0 destroy

Note: This -1 in the coordinates means that it is one block South of the new command block, so it is in-between the new command block and the repeating command block.  If you want to learn more about coordinates, check out my video that you can find in the label section under "coordinates."  

Then, activate the second command block by placing redstone dust next to it, and a redstone torch next to the dust.  This should activate it (warning: you must be close enough to the command block for it to work).  Then type this in the OLD command block:

/replaceitem entity ike06 slot.weapon.offhand 0 totem

Type this in, but use your name instead of mine, Ike06.  And there you go!  This cheat is very useful.

Now, here is a picture of the block dupe glitch that I will talk about next:


This hack duplicates any block.  It is the the infinite diamonds/iron/emeralds/coal/Lapis Lizuli that I talked about at first.

In order to do this hack, you need about 15 redstone dust, 3 repeaters (one which is set to three-ticks, which kind of isn't really in the picture), and 1 sticky piston to the right, and 1 piston to the left.  This will make it so one piston pushes and pulls back the block, and the other piston pushes that block off, and it duplicates the block.  It keeps on pushing and pulling and getting you more and more blocks.  This glitch is super useful!

Anyway, that's it for today!

Wednesday, February 14, 2018

Terraria Xbox One Tips, Hints, and Cheats

Today I will be telling you guys about some Terraria tips, hints, and cheats for Xbox One 1.3.  And for people who can't download the update because of room, I am sorry!

But, anyways, I shall now tell you some tips.  At the beginning of the game, you have a copper short sword, a copper pickax, and a copper ax.  Beware, without a sword, pickax, and ax, you can't mine, chop down trees, or even attack, unless you are farther in the game and have guns, or bows, or magic weapons.  The more you mine, the more you level up.  If you don't have great armor, or weapons, or tools, just go mining!


Now for a couple of hints.  If you go on Expert Mode, there is a better chance of getting more rare items...If you are trying to beat certain bosses, use ranged weapons like a bow or gun.


And now, three cheats!  If you are trying to get tons of water, then you should just "dupe" (duplicate) it. You can do this by making it go down some blocks -- this method also works for lava and honey.  Doing this way will easily generate obsidian.


Also, you can do dupe water by using an inlet pump, and an outlet pump. Or do BOTH the inlet pump and the outlet pump and make the water go down blocks.

And finally, the last cheat.  If you have a friend who wants the stuff that you have, you can dupe it.  Here are the steps for dupping, or duplicating:


  1. Turn autosave off.
  2. Put the item you want to dupe in a chest.
  3. Save and exit your world.
  4. Go back in the world with the chest, and take the item out of it.
  5. The sad part -- kill yourself.
  6. Get out of Terraria before you respawn, and press the "start" button on Terraria, which looks like three straight lines, and press "quit."
  7. Go back in Terraria and go to the world with the chest that you used, and you will have the item in your inventory AND in the chest!
And that's all for today!

Tuesday, February 13, 2018

Minecraft Secrets, Tips, and Tricks

In Minecraft there are quite a bit of Easter eggs (secrets, tips, and tricks).  You can make a Killer Vindicator, and you do this by naming a Vindicator, "Johnny" with a capital "J".  But you can only do this with a nametag.


Now I will tell you a few more nametag secrets!  If you name any mob (animal or enemy), "Grumm" with a capital "G," or "Dinnerbone" with a capital "D," it will turn the mob upside down.


If you name a sheep "jeb_" with a lowercase "j," it will become a rainbow sheep.


I know that "jeb_", and "Dinnerbone", and "Grumm" are Minecraft developers, but I don't know about Johnny.

And now some tricks!  If you place a boat on a slime block, and you get on the boat, it will launch you and the boat flying into the air.  You go so high, it's crazy!


If you shoot the top half of a half slab with a pressure plate on top, it will activate it (the pressure plate).  And if you are standing behind a painting, other players can't see your nametag on the other side.  So now you can make a game of hide-n-go-seek!

I'm sorry if you wanted to know more, but that's it for today!


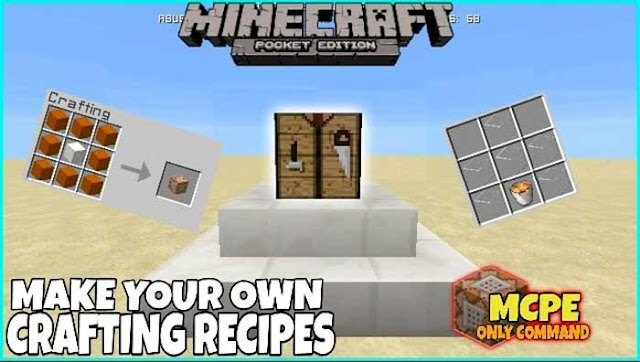
Minecraft Bedrock Edition Tutorials Custom Crafting Recipes!

In Minecraft pe have you ever wanted somthing that you can only get on creative, but you are on survival?  Well you can get those items by c...